Registrations
We now manually approve all new user accounts due to a large influx of spam bots. Accounts are normally approved within 48 hours.
If you need any help with using this Wiki, please ask here: TalkFord.com Wiki Submission Forum
Difference between revisions of "Estate Roof Bars Removal"
Compuwiz uk (Talk | contribs) (New page: == Mk3 Estate Roof Bar Removal == should you need to remove the mk3 roof bars then the following may be of help. ( this guide is just a rough guide at present & will be updated with bett...) |
|||
| (6 intermediate revisions by 2 users not shown) | |||
| Line 1: | Line 1: | ||
| + | {{note|'''The Ford Mondeo hit our roads in 1993, and has consistently been a sales success. Now on its 4th incarnation, it remains a drivers favourite.'''<br> | ||
| + | '''For more information, visit the [http://www.talkford.com/forum/596-mondeo/ Ford Mondeo] forum on [http://www.talkford.com TalkFord.com], the definitive resource site covering all Fords from the present day to the 1970's.'''}} | ||
| + | ---- | ||
| + | {{Infobox | ||
| + | |name = Infobox Template | ||
| + | |bodystyle = float:right; valign:top; | ||
| + | |image = [[File:Fordwiki infobox.png]] | ||
| + | |imagestyle = | ||
| + | |caption = Overview Guide | ||
| + | |captionstyle = | ||
| + | |headerstyle = background:#ccf; | ||
| + | |labelstyle = background:#ddf; | ||
| + | |datastyle = text-align:right; | ||
| + | |header1 = | ||
| + | |label1 = Ford Model: | ||
| + | |data1 = '''Mondeo''' | ||
| + | |header2 = | ||
| + | |label2 = Petrol/Diesel: | ||
| + | |data2 = '''????''' | ||
| + | |header3 = | ||
| + | |label3 = Estimated Cost: | ||
| + | |data3 = '''????''' | ||
| + | |header4 = | ||
| + | |label4 = Difficulty? | ||
| + | |data4 = '''????''' | ||
| + | |label5 = How long does this take? | ||
| + | |data5 = '''????''' | ||
| + | }} | ||
| + | |||
== Mk3 Estate Roof Bar Removal == | == Mk3 Estate Roof Bar Removal == | ||
| Line 12: | Line 41: | ||
Extension bar for socket. | Extension bar for socket. | ||
| − | Torx bits ( | + | Torx bits ( T20 - for the in cabin items, T30 - for the curtain airbag screws ). |
| + | |||
| + | Philips/cross head screwdriver. | ||
Small Flat Screwdriver. | Small Flat Screwdriver. | ||
| Line 21: | Line 52: | ||
'''Front of the bars''' | '''Front of the bars''' | ||
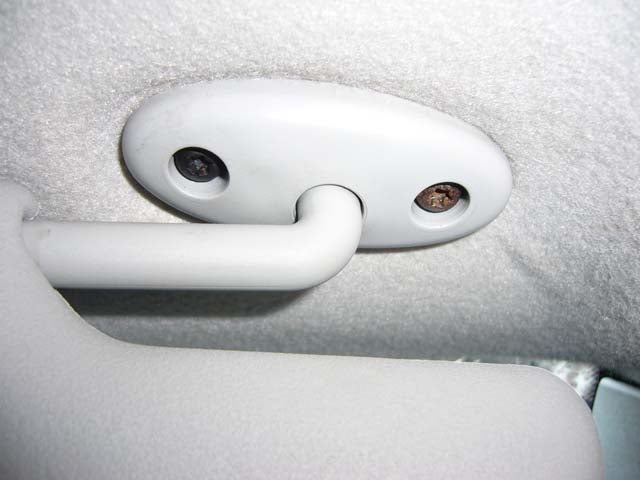
| − | undo the 2 torx screws holding the sunvisor to the car & remove the visor. | + | undo the 2 T20 torx screws holding the sunvisor to the car & remove the visor. |
| − | + | [[Image:No1.jpg]] | |
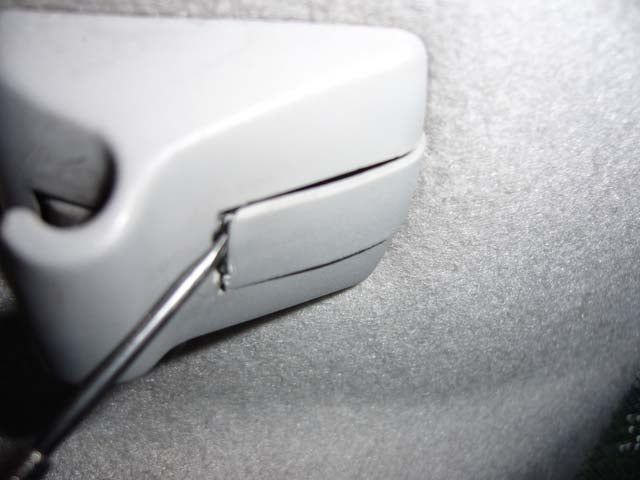
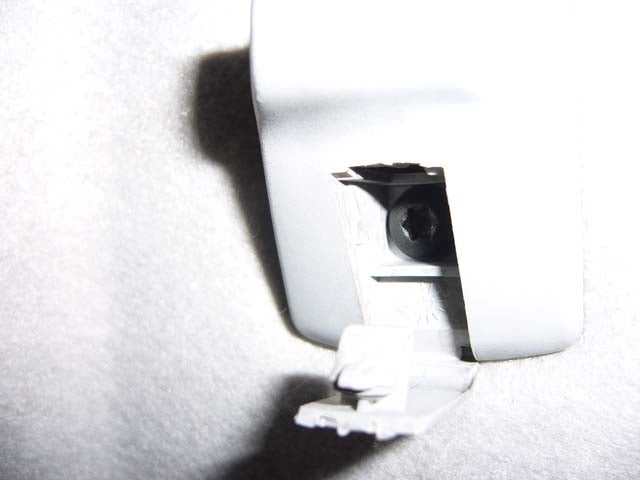
| − | + | using the flat screwdriver unclip the cover on the second sunvisor clip & then undo the T20 torx screw under the cover. | |
| − | + | [[Image:No2.jpg]] | |
| + | |||
| + | [[Image:No3.JPG]] | ||
| + | |||
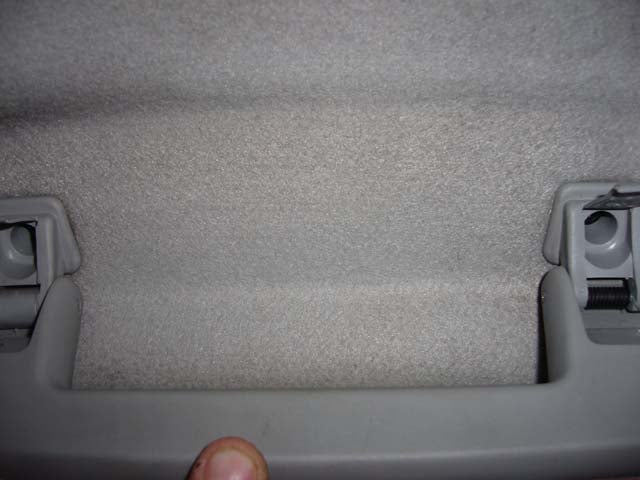
| + | repeat the last step for the 2 T20 torx screws holding the grab handle above the door. | ||
| + | |||
| + | [[Image:No4.jpg]] | ||
| + | |||
| + | remove the a-pillar trim by giving it a tug at the top. | ||
| + | |||
| + | remove the cap on the b-pillar trim & remove the philips head screw found under there & remove the upper b-pillar trim. | ||
| + | |||
| + | [[Image:No5.jpg]] | ||
| + | |||
| + | [[Image:No6.jpg]] | ||
| + | |||
| + | [[Image:No7.jpg]] | ||
carefully fold back the headlining avoiding creasing the headlining. | carefully fold back the headlining avoiding creasing the headlining. | ||
| Line 33: | Line 80: | ||
( there may now be access to both bolts with the use of a spanner but if not the following will need to be done ) | ( there may now be access to both bolts with the use of a spanner but if not the following will need to be done ) | ||
| − | + | [[Image:No8.jpg]] | |
| − | carefully move the airbag inwards a little ( it wont need moving far & wont really move far as its still attached to | + | undo the 2 T30 torx screws holding the curtain airbag inplace. |
| + | |||
| + | carefully move the airbag inwards a little ( it wont need moving far & wont really move far as its still attached to the car via various other fixing points ) | ||
with the airbag moved out far enough then you can access the 2 bolts with the 10mm socket on the extension bar. | with the airbag moved out far enough then you can access the 2 bolts with the 10mm socket on the extension bar. | ||
| + | |||
| + | [[Image:No9.jpg]] | ||
with these 2 bolts undone the front of the bar is undone. | with these 2 bolts undone the front of the bar is undone. | ||
| Line 53: | Line 104: | ||
remove the 2 plastic pushpegs in the boot space lining. | remove the 2 plastic pushpegs in the boot space lining. | ||
| − | + | [[Image:No10.jpg]] | |
| − | + | remove the d-pillar trims by removing the philips screw found in the boot cover retaining section & then giving the trim a tug from the top to release the clips left holding it inplace ) | |
| − | + | [[Image:No11.jpg]] | |
| + | pull the roof lining down suitably without creasing it. | ||
| − | + | using the 10mm socket undo the bolts holding the roof bars inplace ( one is hidden out of the way right inside the bodywork, the other is up near the back end of the curtain airbag ) | |
| + | [[Image:No12.jpg]] | ||
| − | + | once this is done the roof bars should be undone from the car & will just require careful lifting off the roof ( the studs the bols fasten onto are pretty long so ithey will need rasing a fair wat before they are fully out - also watch the paintwork too when doing this ) | |
| + | refit in reverse order. | ||
| − | + | [[Category:Mondeo_Mk3]] | |
| − | + | ||
| − | + | ||
| − | + | ||
| − | [[Category: | + | |
Latest revision as of 23:16, 20 February 2011
For more information, visit the Ford Mondeo forum on TalkFord.com, the definitive resource site covering all Fords from the present day to the 1970's.
|
Overview Guide | |
| Ford Model: | Mondeo |
|---|---|
| Petrol/Diesel: | ???? |
| Estimated Cost: | ???? |
| Difficulty? | ???? |
| How long does this take? | ???? |
Mk3 Estate Roof Bar Removal
should you need to remove the mk3 roof bars then the following may be of help.
( this guide is just a rough guide at present & will be updated with better info & piccies later )
Tools Required
10mm Socket & wrench/spanner.
Extension bar for socket.
Torx bits ( T20 - for the in cabin items, T30 - for the curtain airbag screws ).
Philips/cross head screwdriver.
Small Flat Screwdriver.
Method
Front of the bars
undo the 2 T20 torx screws holding the sunvisor to the car & remove the visor.
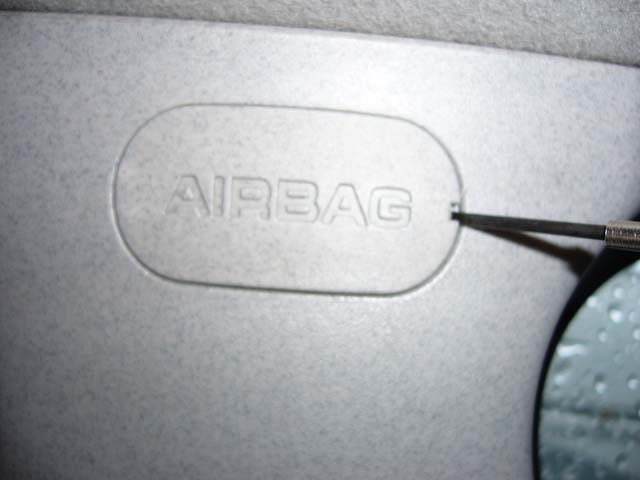
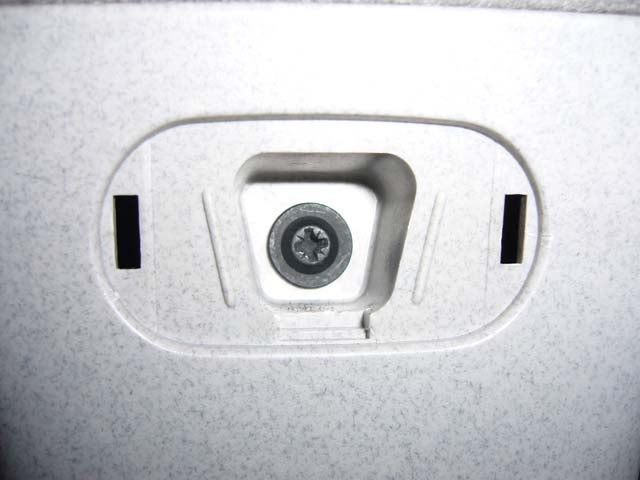
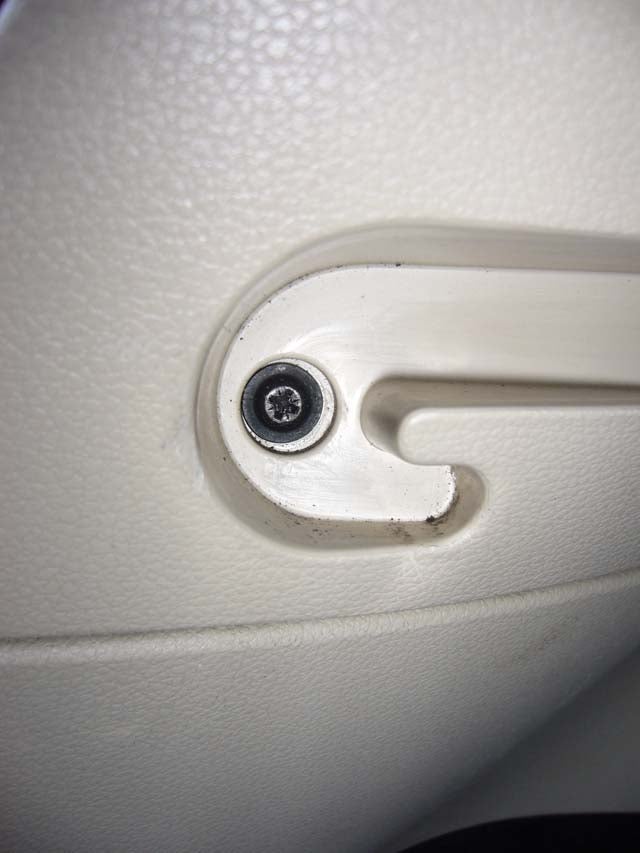
using the flat screwdriver unclip the cover on the second sunvisor clip & then undo the T20 torx screw under the cover.
repeat the last step for the 2 T20 torx screws holding the grab handle above the door.
remove the a-pillar trim by giving it a tug at the top.
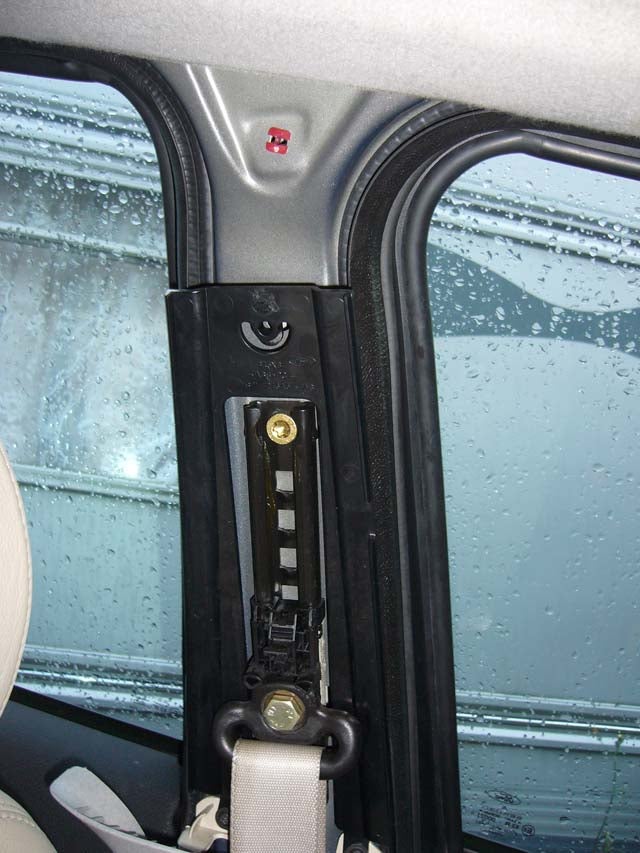
remove the cap on the b-pillar trim & remove the philips head screw found under there & remove the upper b-pillar trim.
carefully fold back the headlining avoiding creasing the headlining.
( there may now be access to both bolts with the use of a spanner but if not the following will need to be done )
undo the 2 T30 torx screws holding the curtain airbag inplace.
carefully move the airbag inwards a little ( it wont need moving far & wont really move far as its still attached to the car via various other fixing points )
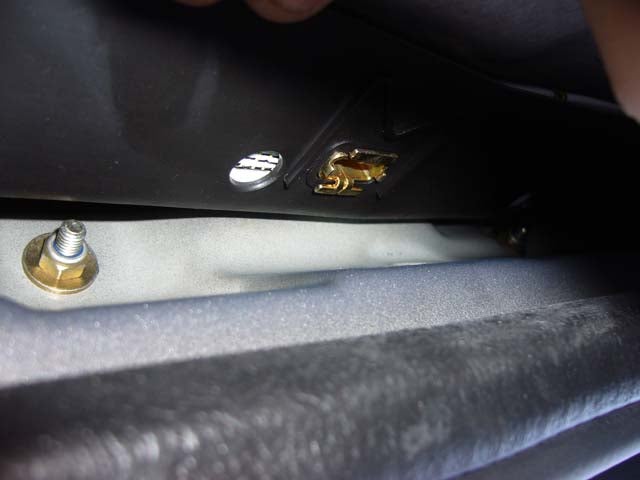
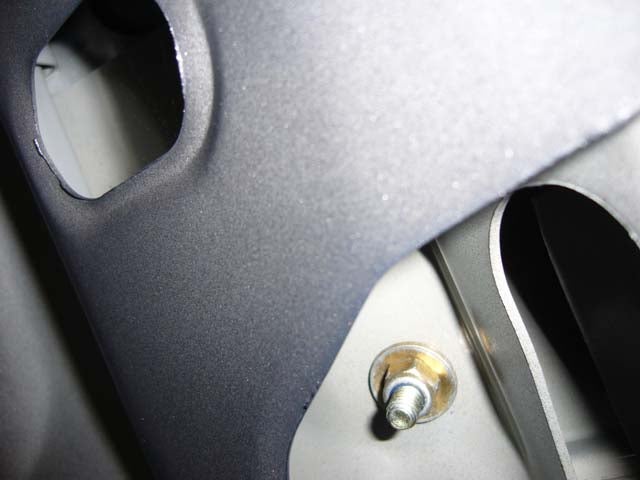
with the airbag moved out far enough then you can access the 2 bolts with the 10mm socket on the extension bar.
with these 2 bolts undone the front of the bar is undone.
Repeat on the other side of the car.
Rear Of The Bars
the rears are a little easier.
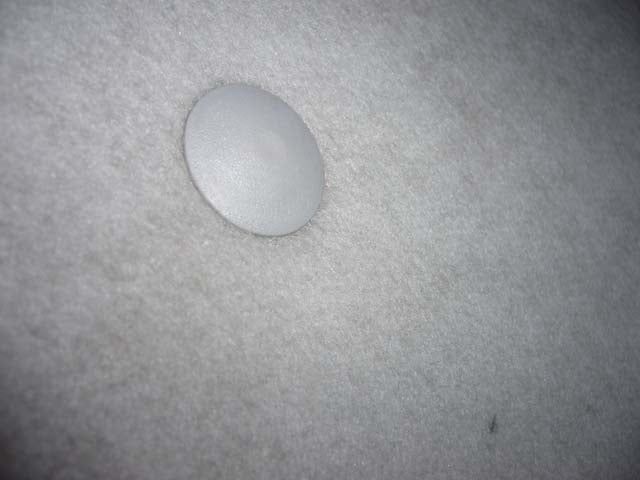
remove the 2 plastic pushpegs in the boot space lining.
remove the d-pillar trims by removing the philips screw found in the boot cover retaining section & then giving the trim a tug from the top to release the clips left holding it inplace )
pull the roof lining down suitably without creasing it.
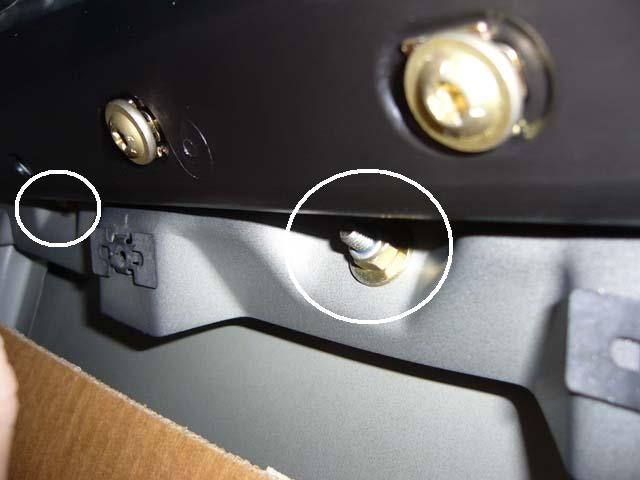
using the 10mm socket undo the bolts holding the roof bars inplace ( one is hidden out of the way right inside the bodywork, the other is up near the back end of the curtain airbag )
once this is done the roof bars should be undone from the car & will just require careful lifting off the roof ( the studs the bols fasten onto are pretty long so ithey will need rasing a fair wat before they are fully out - also watch the paintwork too when doing this )
refit in reverse order.
 Your Privacy Choices