Registrations
We now manually approve all new user accounts due to a large influx of spam bots. Accounts are normally approved within 48 hours.
If you need any help with using this Wiki, please ask here: TalkFord.com Wiki Submission Forum
Difference between revisions of "Pollen Filter - Changing on a Mondeo Mk1/2"
(FIELD_OTHER) |
m |
||
| Line 6: | Line 6: | ||
Recommended extra: Flathead Screwdriver, Paper Towels | Recommended extra: Flathead Screwdriver, Paper Towels | ||
| − | + | ||
=== Method === | === Method === | ||
Revision as of 08:31, 25 April 2009
Pollen Filter (Cabin Air Filter)
Tooling required
Philips Screwdriver, Size 27 Torx Screwdriver
Recommended extra: Flathead Screwdriver, Paper Towels
Method
Pop open the bonnet but do not lift up yet.
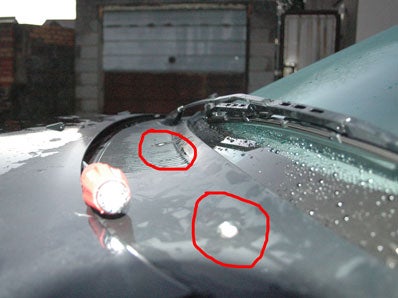
Undo the screw caps on the grill
->
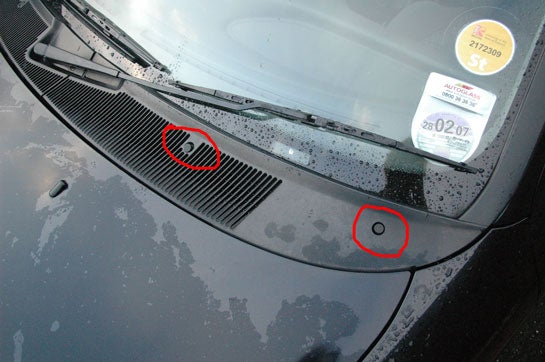
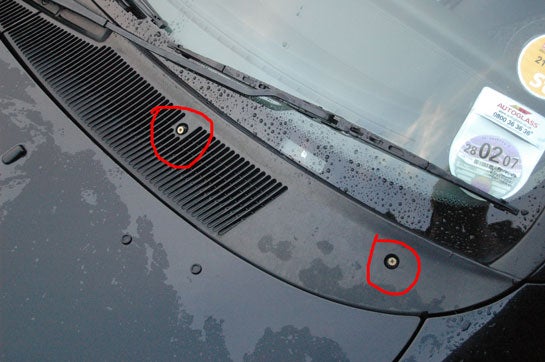
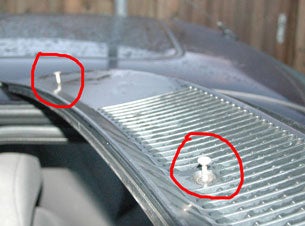
Pull off the rubber strip on the passenger side, exposing the trox screw in the middle. First remove the torx screws, then loosen the philips screws. The philips screws do not needed to be totally removed as they use expanding plugs; they only need to be unscrewed out for only about 10mm. Although there is no harm in totally removing them if you are unsure, but remember to keep the screws in a safe place!
->
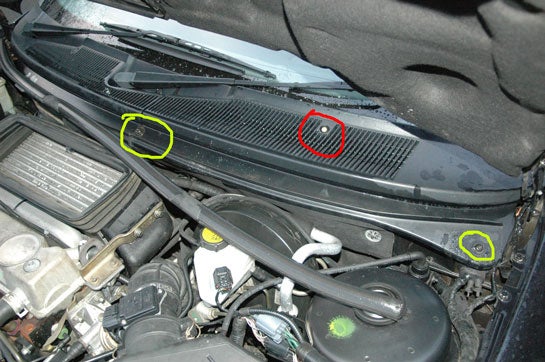
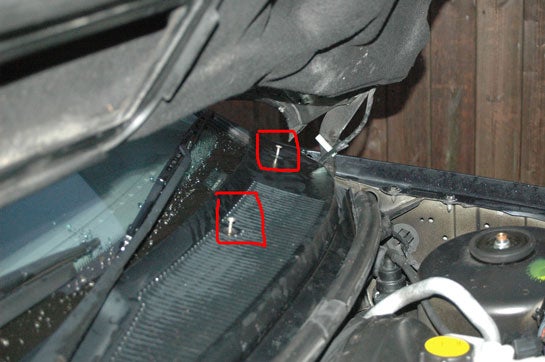
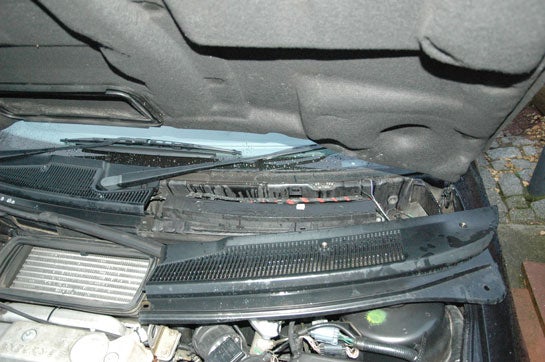
Now it's the hard bit. You will have to juggle to get the grill out. The passenger side grill is slotted into the driver side grill, so you will have to pull out the grill slightly to get it out. The easiest way to do it is to slide towards the passenger side wing, then slide it out towards the front. You will need to lift it up slightly after sliding and by lifting up the passenger side wiper slightly it would help. If it has been raining or there is water on the grill be careful not to tilt or the water may be poured down into the filter area.
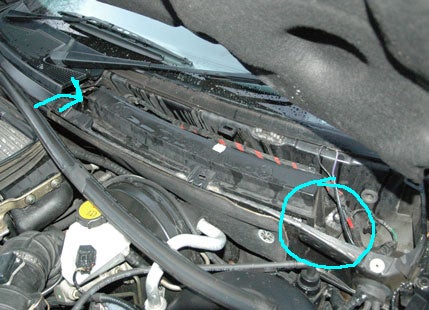
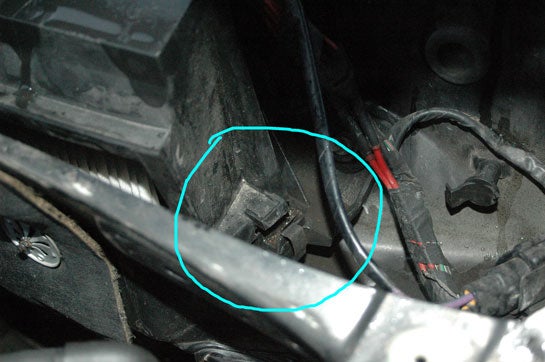
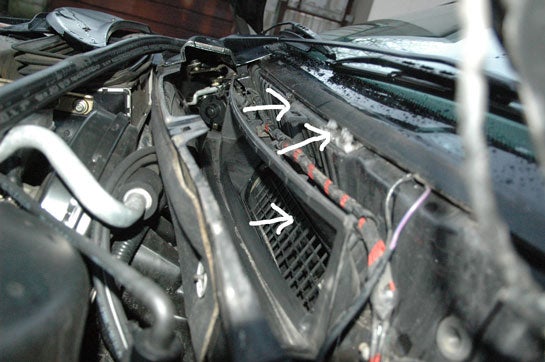
Now unclip the filter housing. It is held in place by two spring clips (Blue circle and arrow), one should be clearly visible and the other one requires a bit of guessing work but it is very straight forward. Then slide and lift out the filter housing.
Now take out the old pollen filter, and clean up your hands! Replace the new one with the foam side curved in. Or else the illustration in the photos should help. There should be slightly cut out slips on the filter element so don't worry about pushing the element tight at the housing.
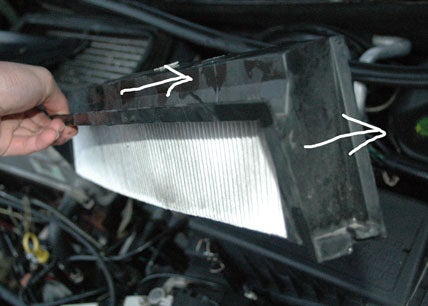
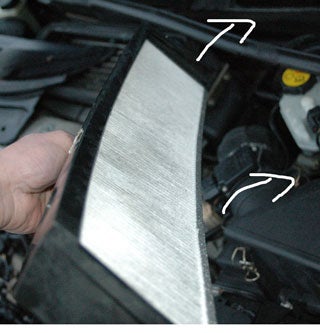
Put the housing back with the new filter installed. It is relatively foolproof process. The curved intake port matches nicely with the housing. Put it back in an it should slot in place nicely; shake it a bit to confirm nice fitting, then put the clips back on both sides.
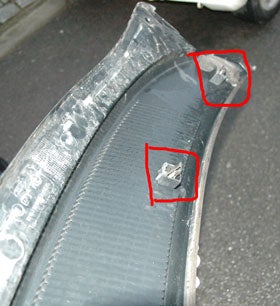
If you have removed the philips screws i would recommend screwing them back in slightly, as seen in the photo the screws are screwed into plastic expanding plugs and the plugs will need to align with the slots to get a good fit. (or the result would be the screws at a weird angle, see the first photo of the grill and you will see what that means) Slide the grill back in the reverse way of taking out. Slot the connecting part back under the driver side grill and then juggle to get it fitted. Ensure the screws are aligned at a proper angle; if not lift it up slightly and fit again.
The final task is to screw back in the torx screws first, slot the rubber strip back in place. Screw the philips screws back in place and replace the plastic caps. The philips screws should be nice and flat if the plastic plugs are in proper position. There is no harm if they are not, but it just doesn't look nice...
Now you've done it! Get into the car, turn on the fan and smell the nice fresh(er) air!
Submitted by siacelestar
 Your Privacy Choices