Registrations
We now manually approve all new user accounts due to a large influx of spam bots. Accounts are normally approved within 48 hours.
If you need any help with using this Wiki, please ask here: TalkFord.com Wiki Submission Forum
Wind Noise Possible Solutions
For more information, visit the Ford Mondeo forum on TalkFord.com, the definitive resource site covering all Fords from the present day to the 1970's.
|
Overview Guide | |
| Ford Model: | Mondeo |
|---|---|
| Petrol/Diesel: | ???? |
| Estimated Cost: | ???? |
| Difficulty? | ???? |
| How long does this take? | ???? |
Contents
- 1 Wind Noises From The Windshield Area
- 2 Wind Noises From The Area Of The Front Door
- 3 Wind Noises From The Area Of The Rear Door
- 4 Door Tolerance Check
- 5 Adjust The Sunroof
- 6 Secure Outer Trim Retaining Strip With Additional Sealing Strip
- 7 Rectify Wind Noises At The Windshield In The Area Of The Front Door.
- 8 Rectify Wind Noises In The Area Of The Front Door
- 9 Rectify Wind Noises From The Rear Door Area
- 10 Cavity Noise
- 11 Parts List
Wind Noises From The Windshield Area
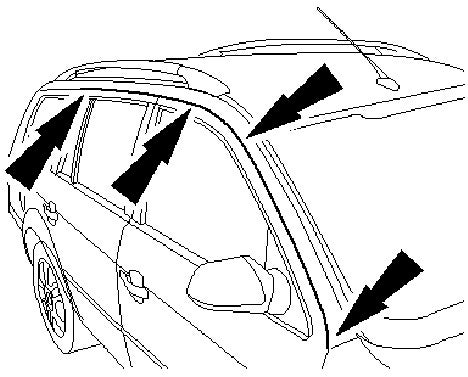
Cause: Loose outer A-pillar trim due to retaining strip and/or clips providing inadequate retaining force. Loose/projecting roof panel trim strip.
To rectify: Secure outer trim retaining strip with additional sealing strip. Secure roof panel trim strip at the windshield using additional silicone sealer.
Wind Noises From The Area Of The Front Door
Cause: Insufficient sealing in the area of the exterior mirror cover, the inner/outer door sealing strip, the window sealing rubber and the external door handle.
To rectify: Apply extra sealing to the affected area.
Wind Noises From The Area Of The Rear Door
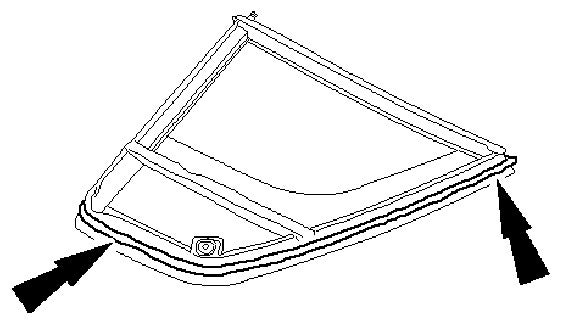
Cause: Gap at the quarter window seal (4 and 5-door vehicles only). Gap at the fixed quarter window cover (wagon only). Insufficient sealing in the area of the door brace and
door inner/outer seals.
To rectify: Seal the quarter window in the area of the window frame using extra sealing strip. Seal any gaps in the fixed quarter window seal using two additional sealing
strips. Seal the door brace and the door inner/outer seals using additional butyl sealing strip.
Cause: Loose or incorrectly installed rubber seals on the rear door window.
To rectify: Check the position of the rear door window rubber seal, correct it if necessary or apply butyl sealing strip to the rubber seal.
Door Tolerance Check
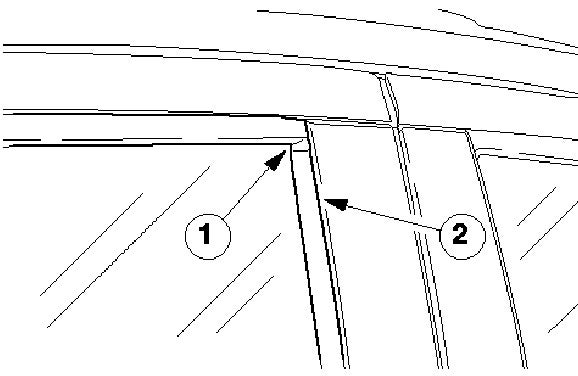
Wind noises can result from protrusion of the doors at the roof frame. Carry out a tolerance check of the doors.
Check the amount by which the door lies below the plane of the roof frame, correct as necessary.
Adjust The Sunroof
The sunroof may cause wind noise if the front or rear edge stands proud.
Check and adjust the sunroof.
Secure Outer Trim Retaining Strip With Additional Sealing Strip
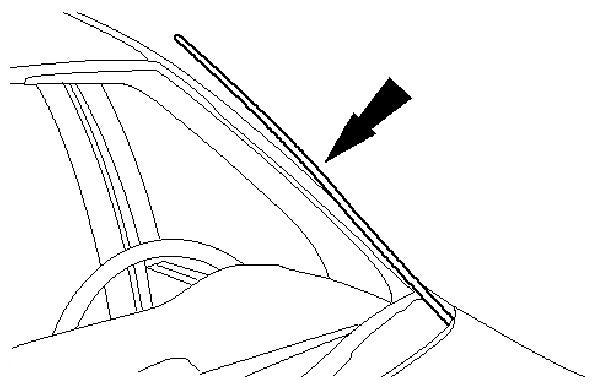
Check the position of the A-pillar outer trim. If the outer trim is loose or damaged, go to next step.
Detach the A-pillar outer trim.
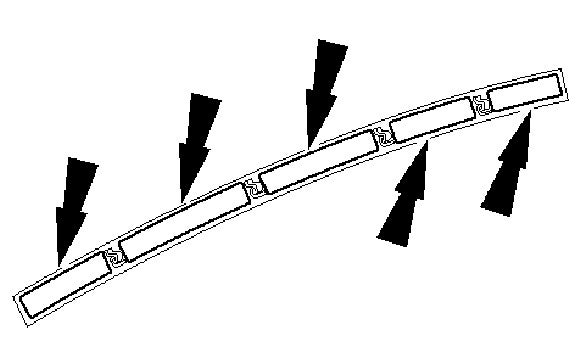
Unclip the outer trim retaining strip (5 clips).
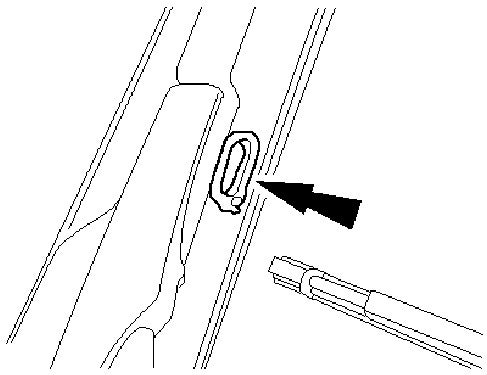
Apply additional butyl sealing strip (L = approx. 6 cm) completely around the slots. Thoroughly clean the area where the seal is to be applied.
Note: Install a new retaining strip if it is damaged.
Rework the retaining strip.
- Use a hot air gun to remove the areas of adhesive applied in production between the clips (also from the new retaining strip if applicable).
- Apply 3M sealing strip between the clips.
- Detach the protective foil.
- Install the retaining strip.
Note:
Install a new outer trim if it is damaged.
Install the A-pillar outer trim.
Rectify Wind Noises At The Windshield In The Area Of The Front Door.
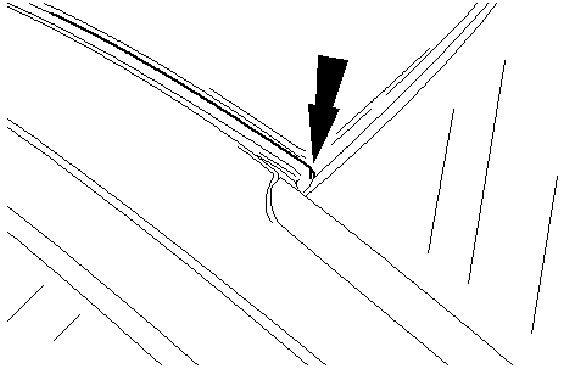
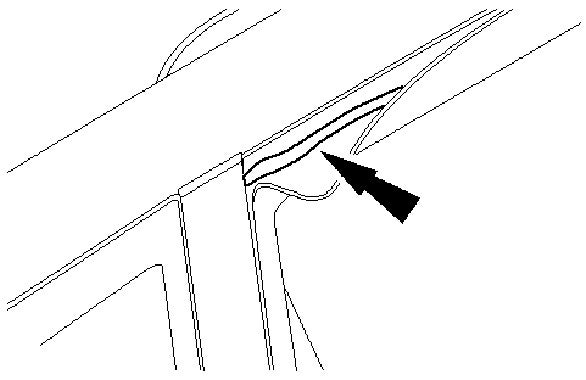
Check the position of the roof panel trim strip. If the roof panel trim strip is loose or protruding, secure it with additional silicone sealer.
Rectify Wind Noises In The Area Of The Front Door
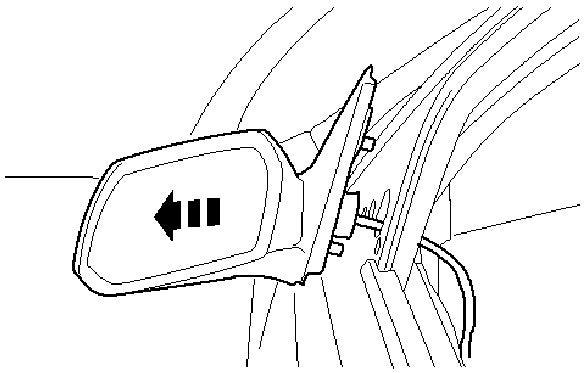
Remove the exterior mirror.
- Lower the door window fully.
- Remove and discard the exterior mirror seal.
Completely cover the rectangular opening in the door frame with textile adhesive strip.
Note:
Do not damage the door sealing strip while detaching it.
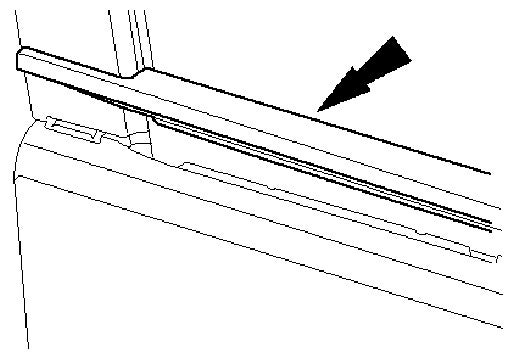
Partially detach the outer door sealing strip.
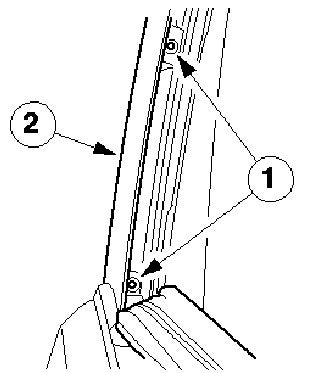
Detach the cover on the front door frame.
- Partially detach the door window rubber seal.
- Remove three screws (two shown).
Completely cover the rectangular opening in the door frame with textile adhesive strip.
Seal the joints between the panel overlaps at the window frame using butyl sealing strip.
Seal the outer door sealing strip.
- Apply a double layer of butyl sealing strip in the door frame cover area.
- Install the outer door sealing strip.
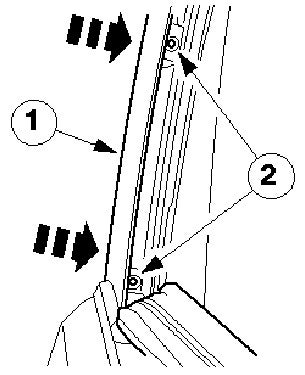
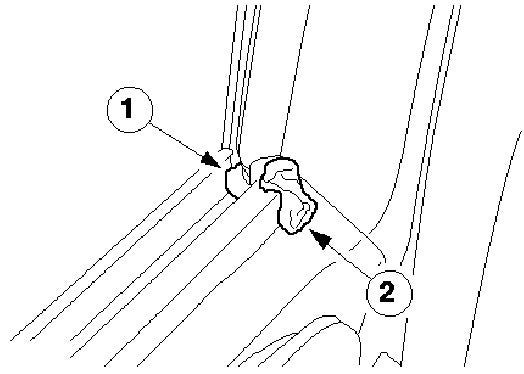
Install the cover on the front door frame.
1. Cover
2. Screws
- Slide the cover inwards until it is in full contact with the door frame. Tighten the screws.
Seal the positions where screw/clips were not installed in production using butyl sealing strip.
Note:
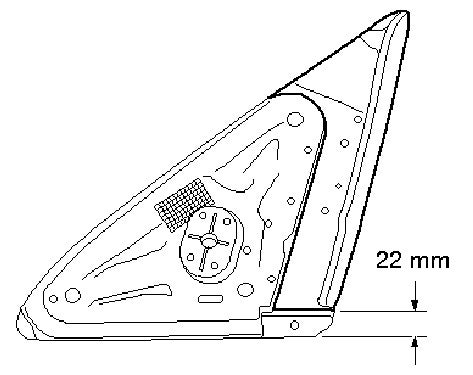
On some vehicles, the exterior mirror seal may have already been shortened. Only shortened seals are available in service.
If necessary rework the new exterior mirror seal.
Note: Bottom bar: 22 mm.
- Mark the indicated area on the new exterior mirror seal and cut off.
Seal and install the exterior mirror.
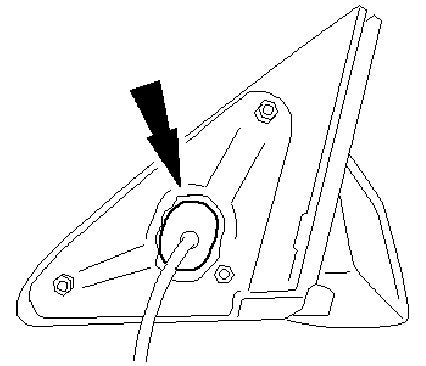
- Place a new exterior mirror seal in position.
- Seal the grooves in the moulding of the seal using silicone sealer. Remove excess sealer.
- Install the exterior mirror.
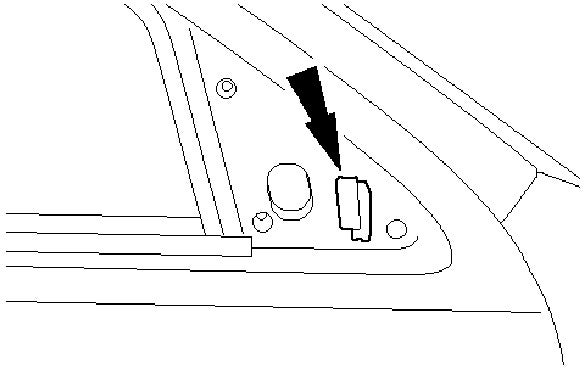
- Connect the electrical connector.
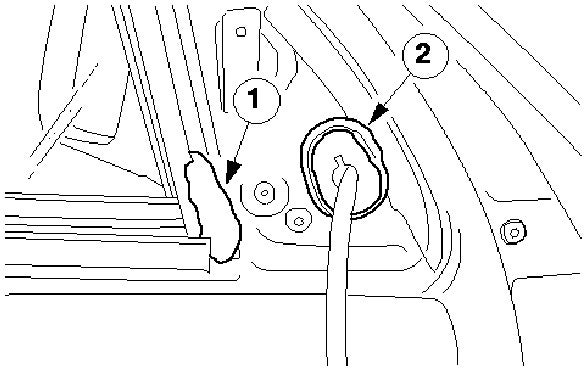
Seal the exterior mirror seal and the inner door sealing strip.
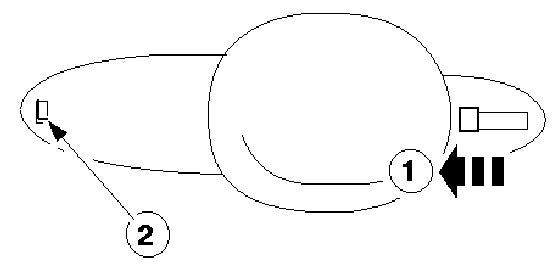
1. Seal the inner door sealing strip in the area of the panel overlaps using butyl sealing strip.
2. Completely seal the exterior mirror seal around the hole using butyl sealing strip.
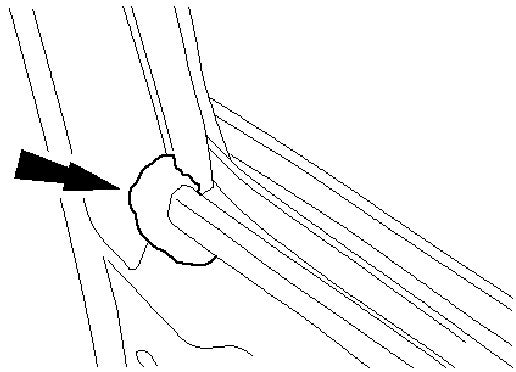
Seal the inner door sealing strip on the inside towards the B-pillar using butyl sealing strip.
Note:
Do not install the exterior mirror cover at this stage.
Attach the door trim. Make certain the door sealing film and the cable clips are installed in their correct positions.
Install the inner cover of the exterior mirror.
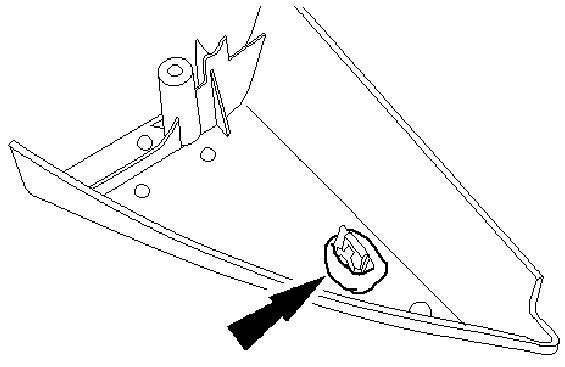
- Apply additional butyl sealing strip around the clip.
- Install the exterior mirror cover.
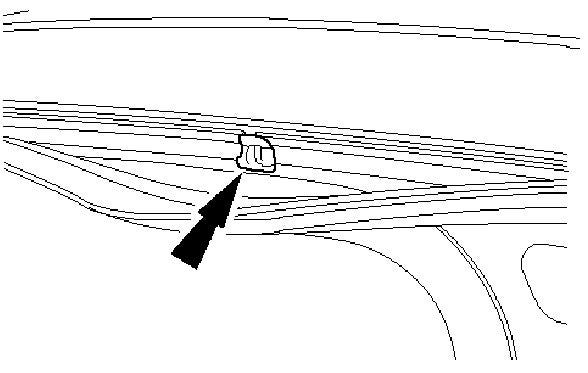
Seal the joints between the panel overlaps at the roof between the A and B-pillars using butyl sealing strip. Open the rear door and partly detach the roof sealing rubber.
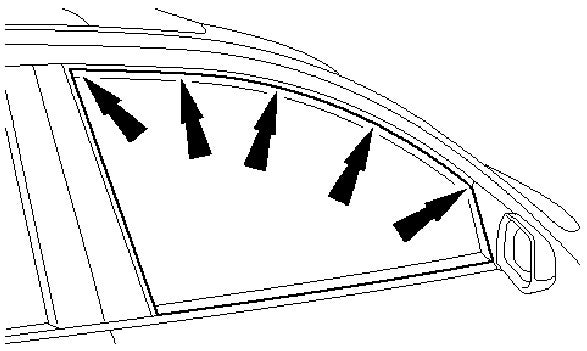
Check the installed position of the front door window glass over the whole of its contact area, correct it as necessary. If necessary, apply some butyl adhesive strip to the rubber seal on the door frame over the whole contact surface.
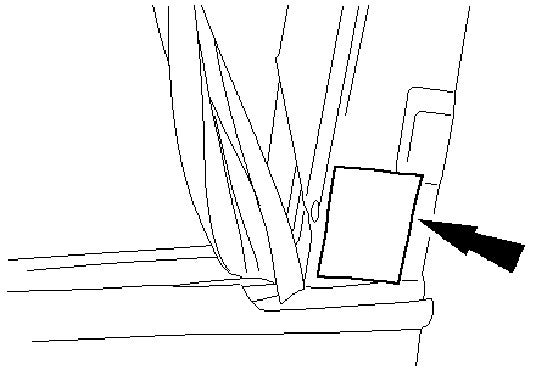
Remove the reinforcement plate for the exterior front door handle.
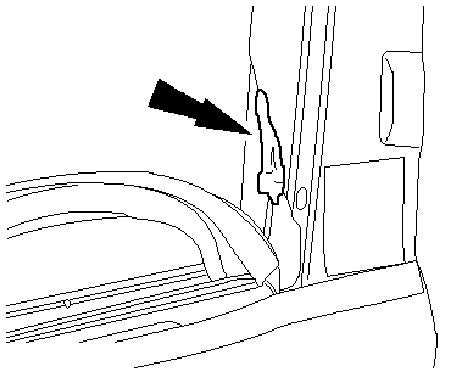
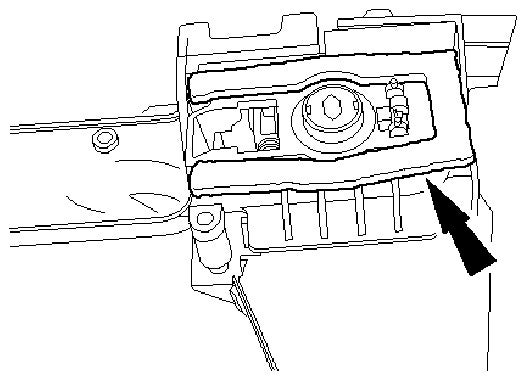
Apply the additional seal (U-shaped) to the reinforcement plate for the exterior front door handle.
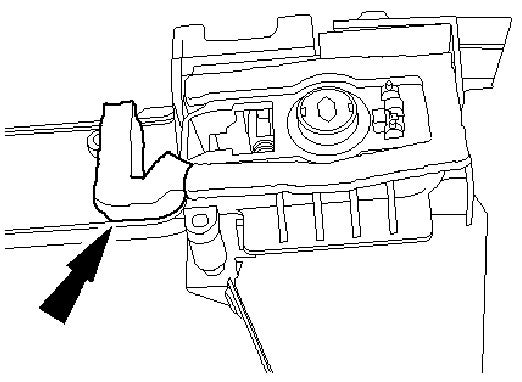
Apply the additional seal (L-shaped) to the reinforcement plate for the exterior front door handle.
To install, reverse the removal procedure.
Rectify Wind Noises From The Rear Door Area
Remove the rear door trim panel.
- Partly lower the door window.
- Remove the outer door sealing strip.
4 And 5-Door Only
Remove the rear quarter window glass trim panel.
Remove the fixed quarter window.
Note: Do not damage the production installed foam strips on the fixed quarter window. Prevent the bolt from dropping out.
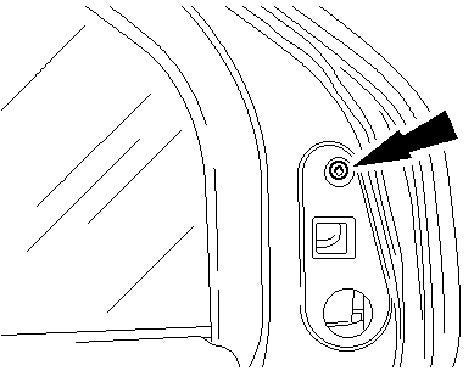
- Unscrew the bolt for the fixed quarter window.
- Remove the fixed quarter window and remove any existing sealer from the rubber seal and window frame.
Seal the fixed quarter window with new butyl sealing strip in the area of the window frame.
Install the fixed quarter window.
Wagon Only (C-pillar)
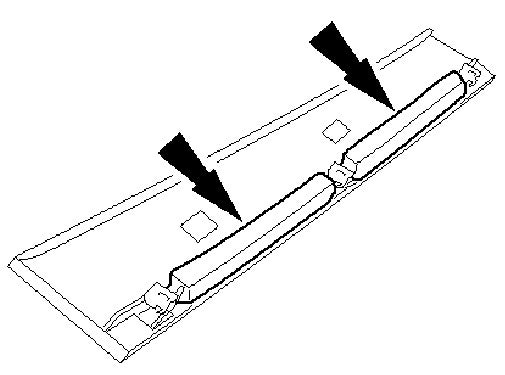
Wind noises may occur because of a gap at the quarter window cover.
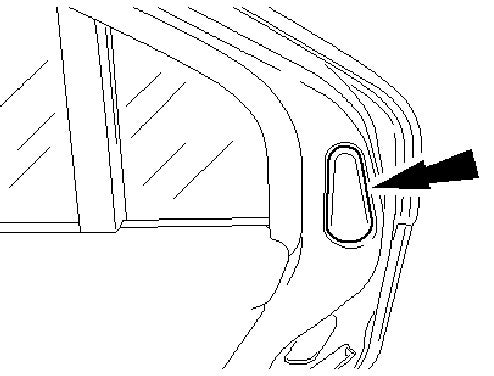
Detach the quarter window cover by pulling it backwards
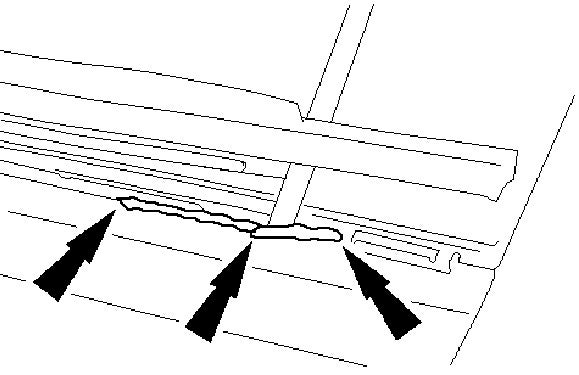
Cut two sealing strips to a size of 150 x 14 x 14 mm and apply them to the inside of the quarter window cover.
Production Action: The quarter window cover has been sealed using an additional sealing strip since 30.01.01 (build code 1J).
All Vehicles
Detach the inner bezel of the door frame (wagon shown). Partially detach the door window rubber seal.
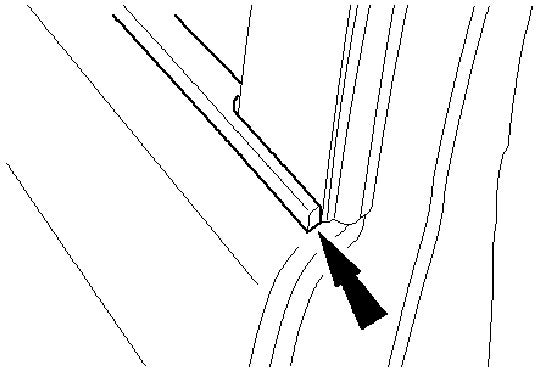
Seal the gap between the rear door brace and the door frame and the hole in the door brace with butyl sealing strip.
Install the inner bezel of the door frame (wagon only). Install the door window sealing rubber.
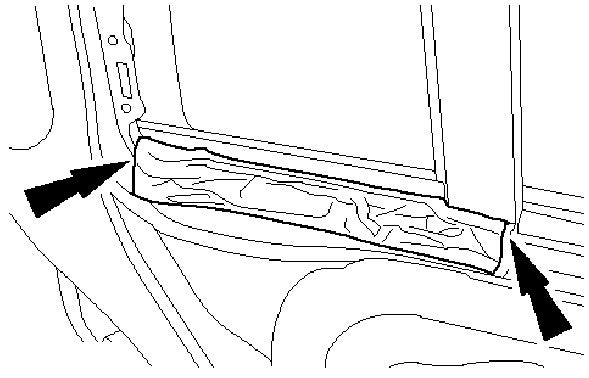
Completely cover the overlaps of the panels in the quarter window area with fabric adhesive strip.
Check the outer door sealing strip and correct its position as necessary. If necessary, bend the door seal into place at the front and secure with butyl sealing strip.
Note:
If necessary this can be applied over the whole contact area in the door frame.
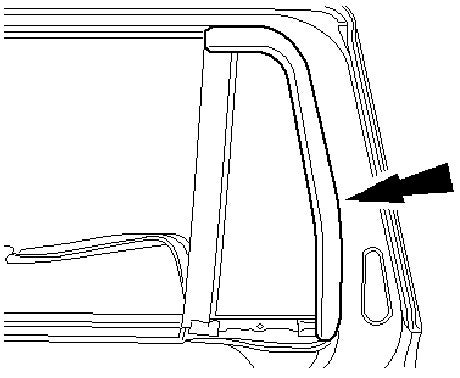
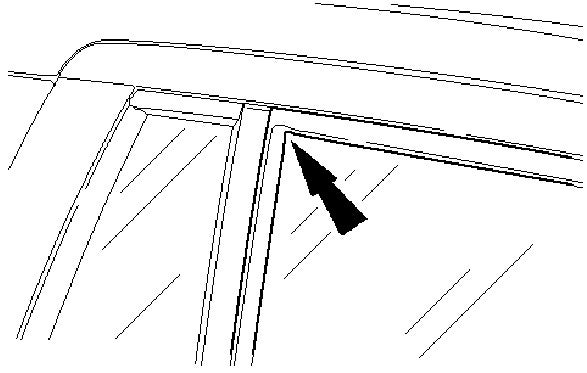
Check the position of the rear door window glass seal at the quarter window and correct it if necessary (wagon shown). If the installed position cannot be improved, go to next step.
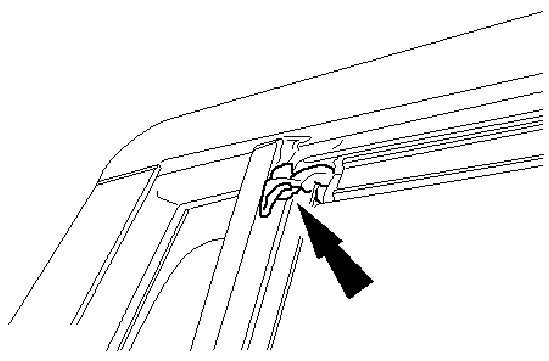
Partially detach the rubber seal of the rear door window glass in the upper corner and apply butyl sealing strip (4/5-door shown).
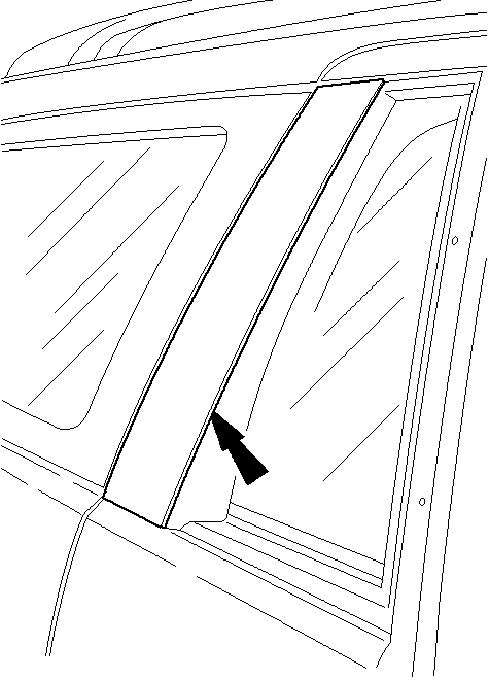
Check the position of the rear door window glass seal at the B-pillar and correct it as necessary.
1. Check the position of the seal and correct it if necessary.
2. If necessary, secure the seal at the door frame cover using additional silicone sealer
Seal the inner door sealing strip.
1. Completely close any open ends of the inner door sealing strip using butyl sealing strip.
2. Seal the inner door sealing strip in the area of the panel overlaps using butyl sealing strip.
Install the door trim.
Check the rubber seal on the roof rail and install a new rubber seal if required.
- Check the correct seating of the roof rail rubber seal, particularly in the rounded areas near the front door. Install a new rubber seal if the existing rubber seal is loose or protruding
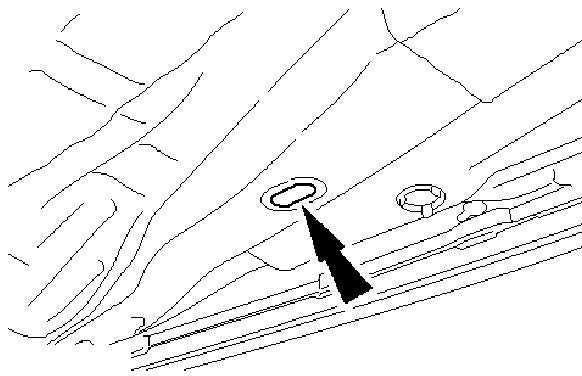
Cavity Noise
Any body cavities that are not properly sealed off to the outside of the vehicle can cause noise, as the volume of air contained in the cavities may start to vibrate.
Install any blanking plugs (see Parts Required) missing in the side members.
Parts List
   ÚÄÄÄÄÄÄÄÄÄÄÄÄÄÄÄÄÄÄÄÄÄÄÄÄÄÄÄÄÄÄÄÂÄÄÄÄÄÄÄÄÄÄÄÄÄÄÄÄÄÄÄÄÄÄÄÄÄÄÄÄÄÄÄ¿
   ³          Description          ³          Finis Code           ³
   ÃÄÄÄÄÄÄÄÄÄÄÄÄÄÄÄÄÄÄÄÄÄÄÄÄÄÄÄÄÄÄÄÅÄÄÄÄÄÄÄÄÄÄÄÄÄÄÄÄÄÄÄÄÄÄÄÄÄÄÄÄÄÄÄ´
   ³ Silicone sealer               ³ 1 044 899                     ³
   ÃÄÄÄÄÄÄÄÄÄÄÄÄÄÄÄÄÄÄÄÄÄÄÄÄÄÄÄÄÄÄÄÅÄÄÄÄÄÄÄÄÄÄÄÄÄÄÄÄÄÄÄÄÄÄÄÄÄÄÄÄÄÄÄ´
   ³ Seal, exterior mirror, right  ³ 1 219 654                     ³
   ³ -hand side (if required)      ³                               ³
   ÃÄÄÄÄÄÄÄÄÄÄÄÄÄÄÄÄÄÄÄÄÄÄÄÄÄÄÄÄÄÄÄÅÄÄÄÄÄÄÄÄÄÄÄÄÄÄÄÄÄÄÄÄÄÄÄÄÄÄÄÄÄÄÄ´
   ³ Seal, exterior mirror, left   ³ 1 219 655                     ³
   ³ -hand side (if required)      ³                               ³
   ÃÄÄÄÄÄÄÄÄÄÄÄÄÄÄÄÄÄÄÄÄÄÄÄÄÄÄÄÄÄÄÄÅÄÄÄÄÄÄÄÄÄÄÄÄÄÄÄÄÄÄÄÄÄÄÄÄÄÄÄÄÄÄÄ´
   ³ Rubber seal, roof rail ( if   ³ Refer to TSB 52/2002          ³
   ³ required)                     ³                               ³
   ÃÄÄÄÄÄÄÄÄÄÄÄÄÄÄÄÄÄÄÄÄÄÄÄÄÄÄÄÄÄÄÄÅÄÄÄÄÄÄÄÄÄÄÄÄÄÄÄÄÄÄÄÄÄÄÄÄÄÄÄÄÄÄÄ´
   ³ Seal, reinforcement plate,    ³ 1 221 515                     ³
   ³ front exterior door handle (L ³                               ³
   ³ -shaped) (if required)        ³                               ³
   ÃÄÄÄÄÄÄÄÄÄÄÄÄÄÄÄÄÄÄÄÄÄÄÄÄÄÄÄÄÄÄÄÅÄÄÄÄÄÄÄÄÄÄÄÄÄÄÄÄÄÄÄÄÄÄÄÄÄÄÄÄÄÄÄ´
   ³ Seal, reinforcement plate,    ³ 1 221 516                     ³
   ³ front exterior door handle (U ³                               ³
   ³ -shaped) (if required)        ³                               ³
   ÃÄÄÄÄÄÄÄÄÄÄÄÄÄÄÄÄÄÄÄÄÄÄÄÄÄÄÄÄÄÄÄÅÄÄÄÄÄÄÄÄÄÄÄÄÄÄÄÄÄÄÄÄÄÄÄÄÄÄÄÄÄÄÄ´
   ³ Retaining strip, A-pillar     ³ 1 136 187                     ³
   ³ outer trim, LHS (if required) ³                               ³
   ÃÄÄÄÄÄÄÄÄÄÄÄÄÄÄÄÄÄÄÄÄÄÄÄÄÄÄÄÄÄÄÄÅÄÄÄÄÄÄÄÄÄÄÄÄÄÄÄÄÄÄÄÄÄÄÄÄÄÄÄÄÄÄÄ´
   ³ Retaining strip, A-pillar     ³ 1 136 189                     ³
   ³ outer trim, RHS (if required) ³                               ³
   ÃÄÄÄÄÄÄÄÄÄÄÄÄÄÄÄÄÄÄÄÄÄÄÄÄÄÄÄÄÄÄÄÅÄÄÄÄÄÄÄÄÄÄÄÄÄÄÄÄÄÄÄÄÄÄÄÄÄÄÄÄÄÄÄ´
   ³ A-pillar outer trim, RHS (if  ³ 1 153 080                     ³
   ³ required)                     ³                               ³
   ÃÄÄÄÄÄÄÄÄÄÄÄÄÄÄÄÄÄÄÄÄÄÄÄÄÄÄÄÄÄÄÄÅÄÄÄÄÄÄÄÄÄÄÄÄÄÄÄÄÄÄÄÄÄÄÄÄÄÄÄÄÄÄÄ´
   ³ Outer A-pillar trim, LHS (as  ³ 1 153 081                     ³
   ³ required)                     ³                               ³
   ÃÄÄÄÄÄÄÄÄÄÄÄÄÄÄÄÄÄÄÄÄÄÄÄÄÄÄÄÄÄÄÄÅÄÄÄÄÄÄÄÄÄÄÄÄÄÄÄÄÄÄÄÄÄÄÄÄÄÄÄÄÄÄÄ´
   ³ Butyl sealing strip (4 mm     ³ 1 128 983                     ³
   ³ diameter)                     ³                               ³
   ÃÄÄÄÄÄÄÄÄÄÄÄÄÄÄÄÄÄÄÄÄÄÄÄÄÄÄÄÄÄÄÄÅÄÄÄÄÄÄÄÄÄÄÄÄÄÄÄÄÄÄÄÄÄÄÄÄÄÄÄÄÄÄÄ´
   ³ 3M sealing strip              ³ 1 623 636                     ³
   ÃÄÄÄÄÄÄÄÄÄÄÄÄÄÄÄÄÄÄÄÄÄÄÄÄÄÄÄÄÄÄÄÅÄÄÄÄÄÄÄÄÄÄÄÄÄÄÄÄÄÄÄÄÄÄÄÄÄÄÄÄÄÄÄ´
   ³ Cover plugs in side member    ³ 1 141 982                     ³
   ³ (if required)                 ³                               ³
   ÃÄÄÄÄÄÄÄÄÄÄÄÄÄÄÄÄÄÄÄÄÄÄÄÄÄÄÄÄÄÄÄÅÄÄÄÄÄÄÄÄÄÄÄÄÄÄÄÄÄÄÄÄÄÄÄÄÄÄÄÄÄÄÄ´
   ³ Sealing strips (if required)  ³ 1 047 138                     ³
   ÃÄÄÄÄÄÄÄÄÄÄÄÄÄÄÄÄÄÄÄÄÄÄÄÄÄÄÄÄÄÄÄÅÄÄÄÄÄÄÄÄÄÄÄÄÄÄÄÄÄÄÄÄÄÄÄÄÄÄÄÄÄÄÄ´
   ³ Fabric adhesive strip         ³ locally procured              ³
   ÀÄÄÄÄÄÄÄÄÄÄÄÄÄÄÄÄÄÄÄÄÄÄÄÄÄÄÄÄÄÄÄÁÄÄÄÄÄÄÄÄÄÄÄÄÄÄÄÄÄÄÄÄÄÄÄÄÄÄÄÄÄÄÄÙ
 Your Privacy Choices