Registrations
We now manually approve all new user accounts due to a large influx of spam bots. Accounts are normally approved within 48 hours.
If you need any help with using this Wiki, please ask here: TalkFord.com Wiki Submission Forum
MAF (Mass Air Flow) Sensor Clean 130 TDCI
For more information, visit the Ford Mondeo forum on TalkFord.com, the definitive resource site covering all Fords from the present day to the 1970's.
|
Overview Guide | |
| Ford Model: | Mondeo |
|---|---|
| Petrol/Diesel: | ???? |
| Estimated Cost: | ???? |
| Difficulty? | ???? |
| How long does this take? | ???? |
Contents
MAF (Mass Air Flow) Sensor Clean - 2004 130 TDCi Euro 4
Disclaimer
Disclaimer: As we live in a litigious world I have to make it clear that no guarantee or warranties are expressed or implied, you follow this guide entirely at your own risk. If you, your car, or any 3rd party is damaged as a consequence of following this guide that is not my responsibility. Hope that is clear!
Introduction
MAF (Mass Air Flow sensor) relays information to the ECU/PCM regarding the amount of air that is being drawn into the engine. With this information, the PCM varies the fuel needed to keep the car running as it should.
Certainly on earlier fords (not sure about the Mk3 Mondeo - but most likely!), the information from the MAF also had an influence on the automatic gearbox and its function.
The Mondeo uses a 'hot wire' MAF sensor - basically, a wire is heated to a set temperature, and the MAF electronics measures the electrical current needed to maintain that temperature... so, the more air going through, the more there is a cooling effect on the wire thus the more electrical power is needed to maintain the wire at its temperature...
Although the MAF is located on the 'clean' side of the air filter pipework, microscopic particles will get drawn through the air filter into the inlet tract of the engine, over time there will be a build up of particles that have burnt onto the MAF hot wire. This leads to a condition where more electrical current is needed to heat the wire in the first place, but this is due to the muck burnt onto the wire and not because of increased airflow, thus inaccurate information is sent to the PCM.
When the MAF gets dirty, it will be sending inaccurate information to the PCM, leading to driveability issues. (hesitation.. poor 'pick up', poor fuel economy, etc).
Note that a dirty MAF wont usually generate a 'Engine Management Fault' (EMF) light on the dashboard, as the readings that a dirty MAF is relaying to the PCM arent out of its operating range indicating a malfunction... it is just inacurate readings due to external contaminents. These inaccurate readings are basically telling the PCM that more air is being drawn in than in fact is.
As my car was experiencing some low revs drivablilty issues, I decided to clean out the MAF sensor.
The photo sequence that follows shows the work involved on a 2004 Ford Mondeo 130 TDCi ‘Euro4’, though I am sure other models will be similar.
The text and photos were done by Dave Yardy (daveyardy@hotmail.com) and this is the 'version 1'.
Parts and Tools Needed
The work involved is simple and should well be in the capabilities of the home mechanic, the car doesn’t need to be lifted and the work is all done at the front of the car.
You need a T20 Torx screwdriver to remove the two screws that hold the MAF in the inlet duct.
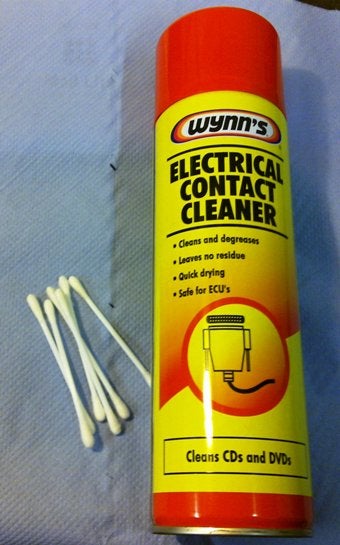
5 or so cotton buds.
Paper Towel
Some Electrical Contact cleaner / Carburettor Cleaner / Isopropyl alcohol.
Locating and removing the MAF
Disconnecting the MAF will generate a Fault code/trigger a EMF light, so before starting.. its worth ensuring that the ignition is 'off', You may wish to disconnect the battery.
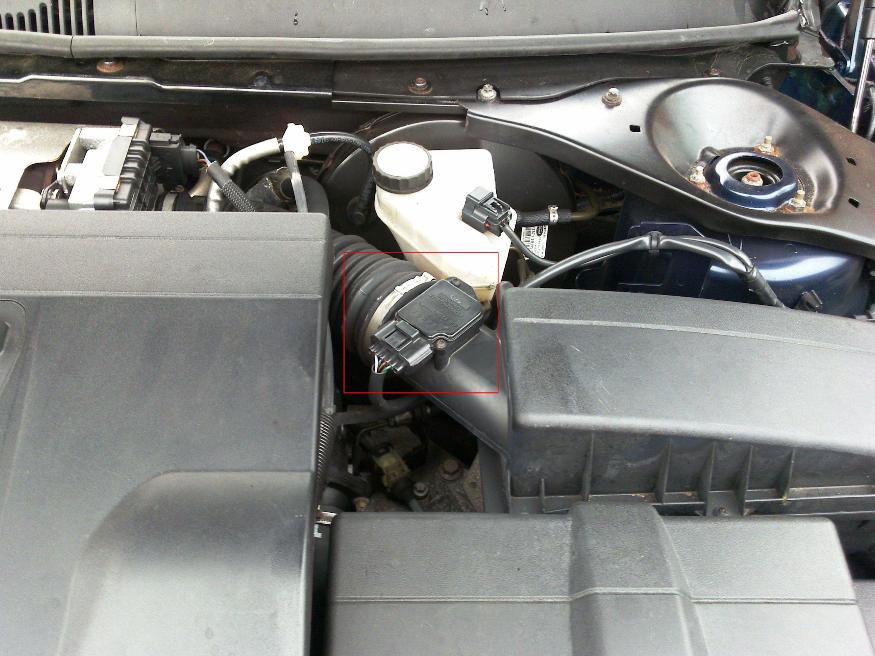
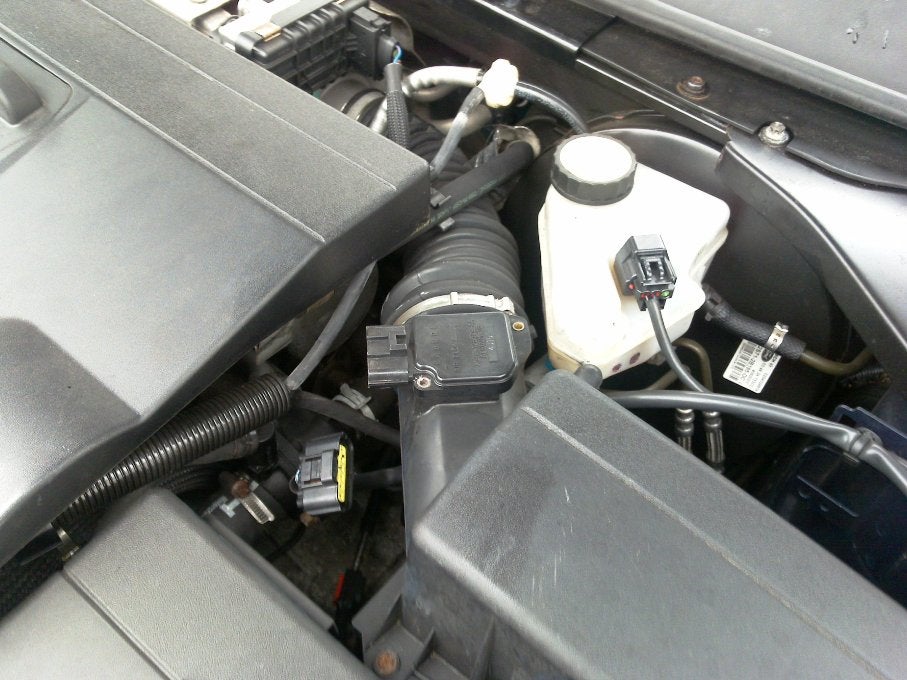
The sensor is located on the top of the air inlet trunking... just infront of the brake fluid reservoir
This picture shows the MAF sensor that is to be removed (inside the red box):
- Unplug its electrical connector
- Undo the two torx headed screws holding the sensor into the duct.
- Pull the sensor up and take it to the workbench.. note that it may appear to be stuck in the ducting - this is the rubber seal holding it in place.
- Note that the sensor is *very delicate* dont drop it, poke a screwdriver in it or anything like that! - New ones are circa £100!
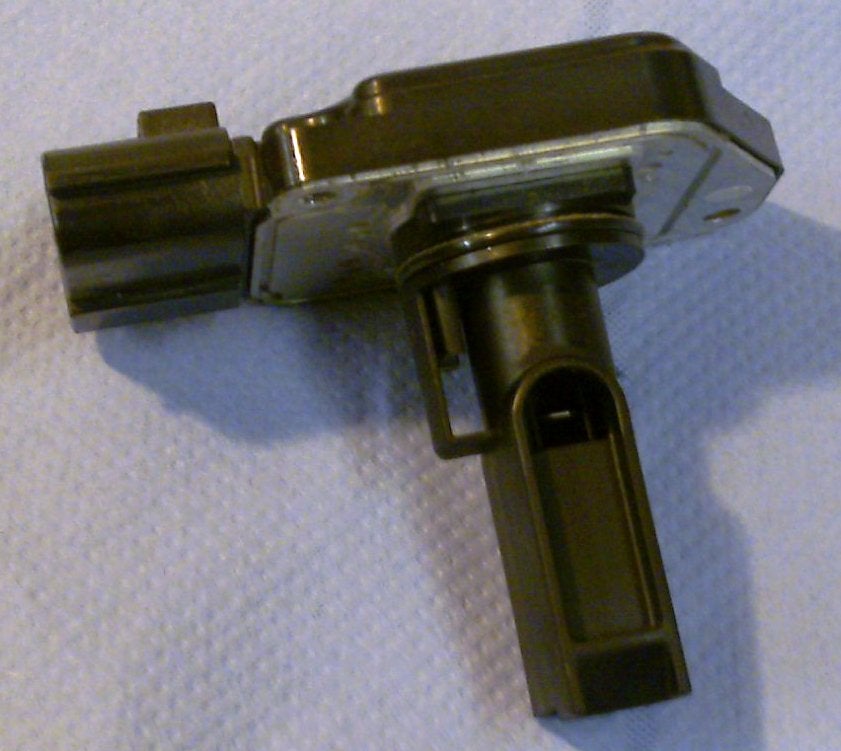
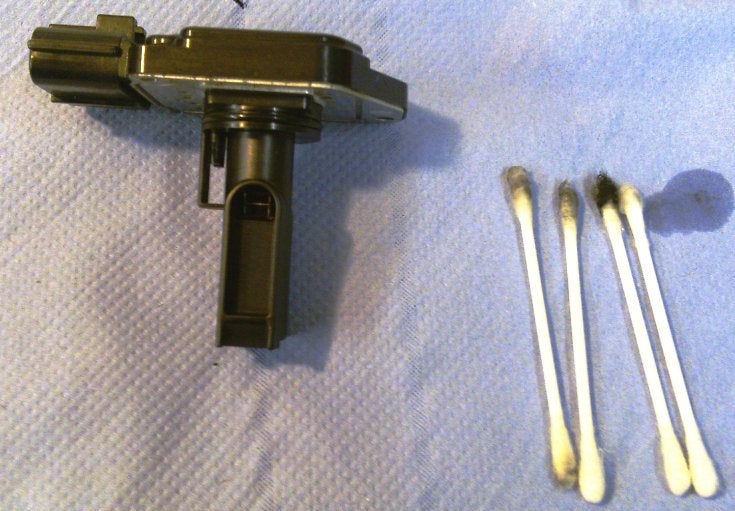
The black plastic of this sensor was covered in a fine layer of soot. You can make out one of the wires in the window of the sensor... the other one is further inside..
Cleaning the MAF
Using the cotton buds and whatever cleaning colution you opted for, you need to carefully clean the body of the sensor and the two wires contained within it.
I used:
WARNING The sensor wires are *very* easily bent and/or broken - extreme care is needed with the soaked cotton bud to ensure that no damage whatsoever is inflicted on the wires
- Clean the outside of the sensor with the paper towel and cleaner.
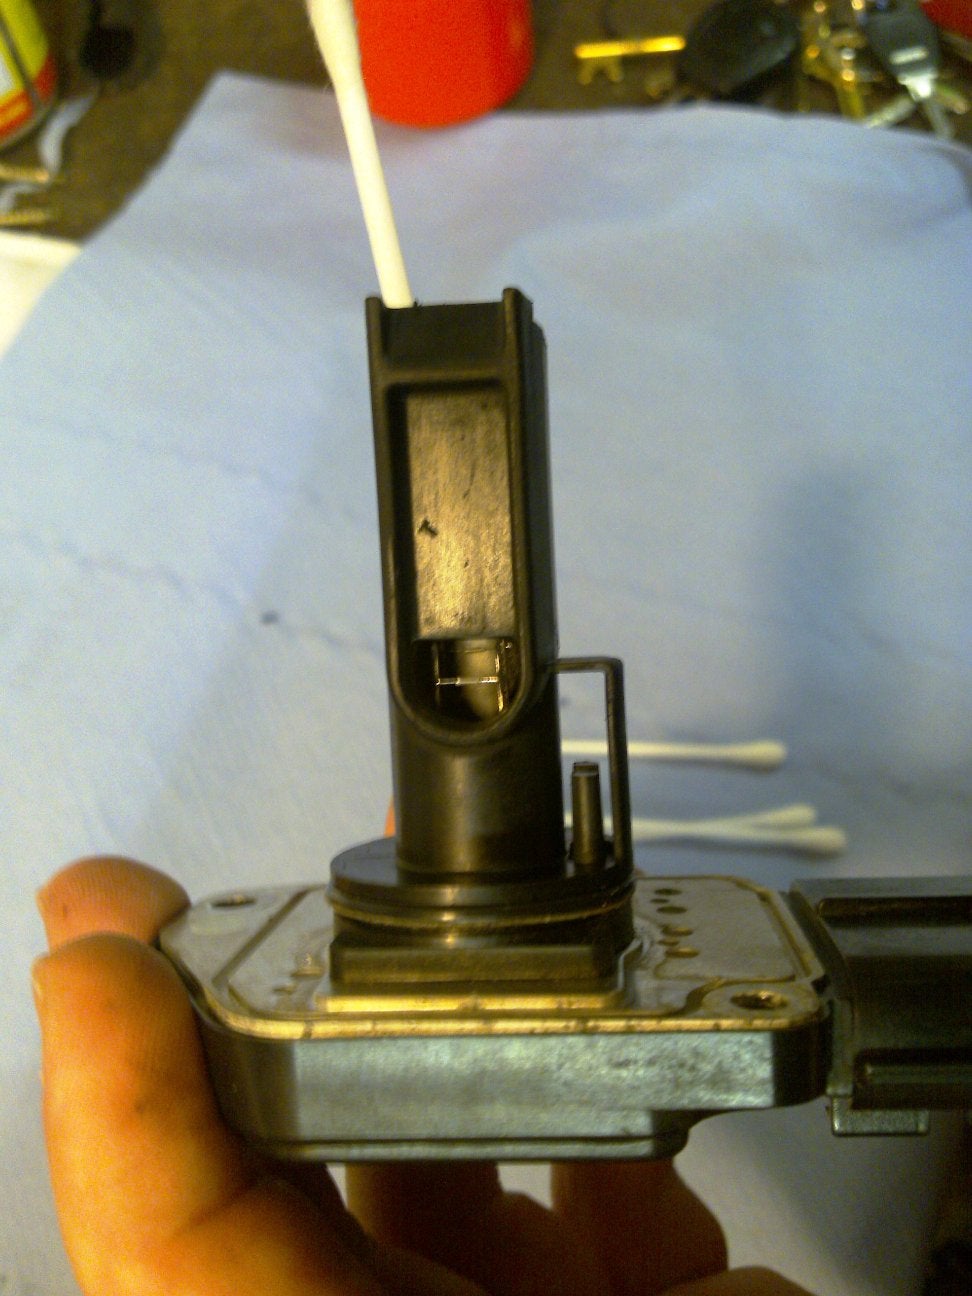
- Soak the end of a cotton bud in the cleaner and *gently* clean the wires. You should notice a difference in the appearance of the wires as they come clean.
On this pic you can see the second wire further inside the sensor (with the tip of the cotton bud behind it)
All being well, you should now have a nice clean MAF sensor with no filth left in or on it and the sensor wires, bright and clean and undamaged.
Note that the method I have described here uses cotton buds.. Just spraying the sensor and the wires with carburettor cleaner should also have the same cleaning effect, only caveat here is that the spray carburettor cleaners do come out of the can with some force which may damage the wires if sprayed directly.
Reassembly and Finishing off
- Although the cleaner should evaporate after a few seconds... its worth ensuring that all is dry before refiting it back to the car.
- Push the sensor back into its hole in the inlet ducting. A smear of lube on the rubber O ring seal at the top of the sensor may help it home (though not essential).
- Screw back into place the two torx screws that hold the sensor in.
- Connect up the electrical plug.
- Reconnect the battery (if you disconnected it).
And thats it! - Take the car out for a drive and spot the difference :)
 Your Privacy Choices