Registrations
We now manually approve all new user accounts due to a large influx of spam bots. Accounts are normally approved within 48 hours.
If you need any help with using this Wiki, please ask here: TalkFord.com Wiki Submission Forum
Front poly anti roll bar bushes
For more information, visit the Ford Mondeo forum on TalkFord.com, the definitive resource site covering all Fords from the present day to the 1970's.
|
Courtesy of TalkFord.com | |
| Author: | Various |
|---|---|
| Ford Model: | Mondeo Mk3 |
| Estimated Cost: | ???? |
| Difficulty? | ???? |
| How long does this take? | ???? |
jack up the front of car as much as possible and securely sit on axle stands
remove both wheels
remove lower splash guard inside wheel arch (if fitted)
remove screws closest to suspension strut to allow easier access
Contents
WARNING! PLEASE READ THE BELOW NOTES BEFORE STARTING WORK
pay attention!
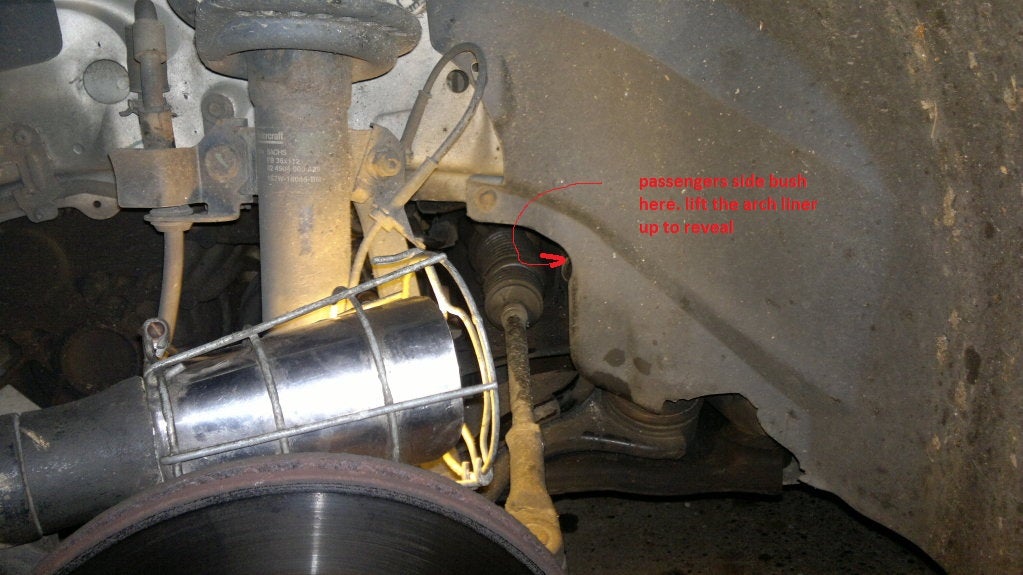
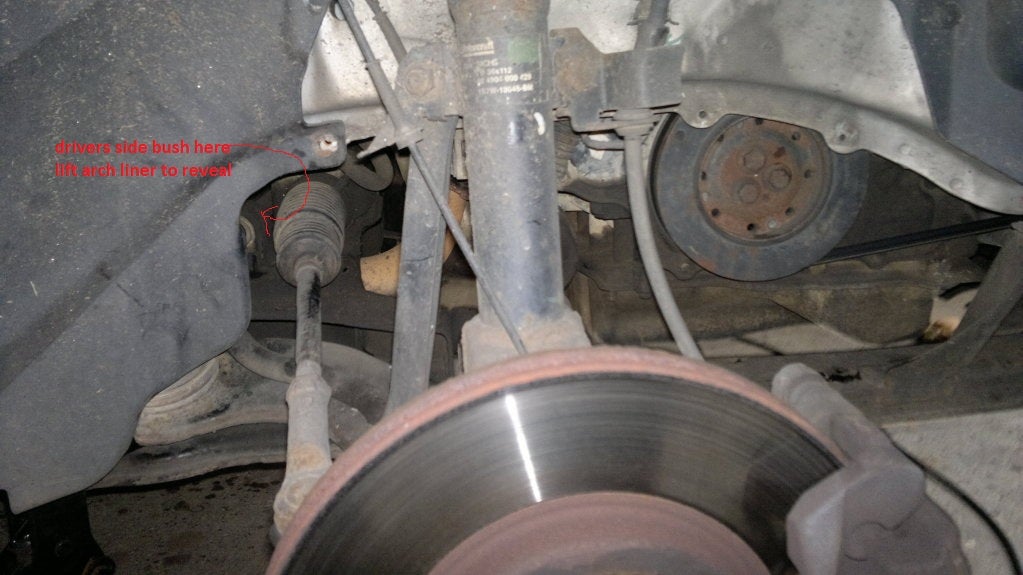
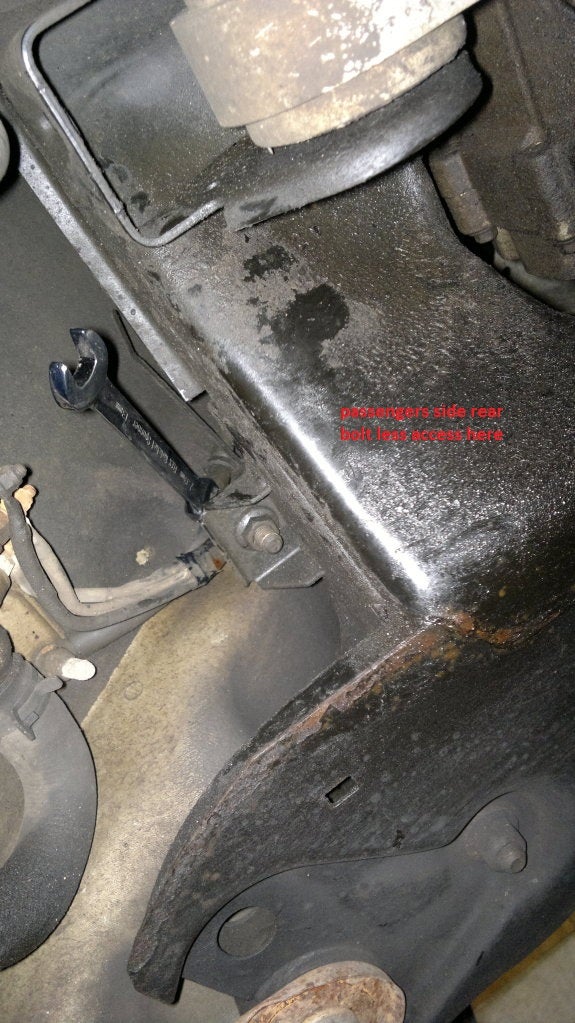
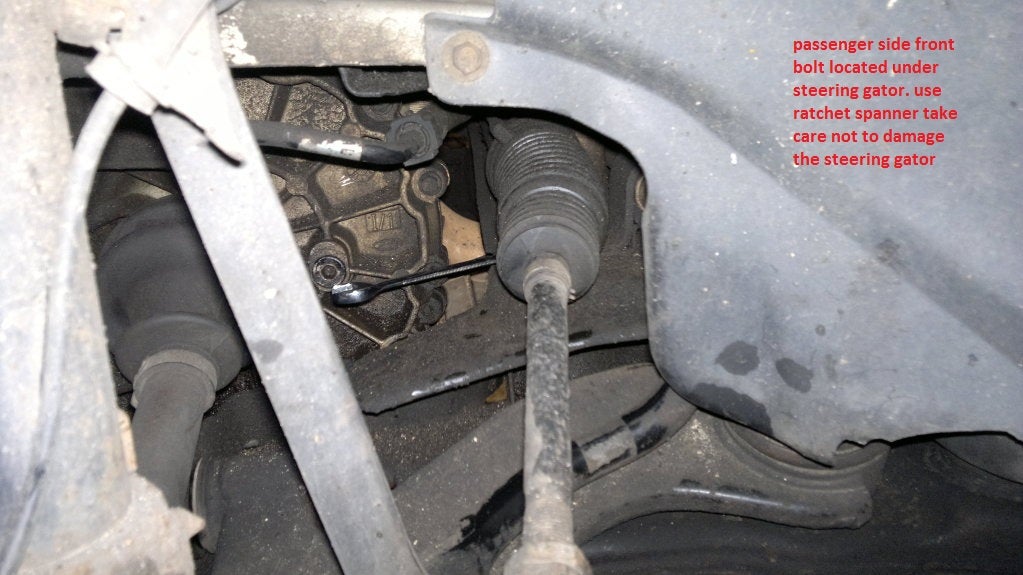
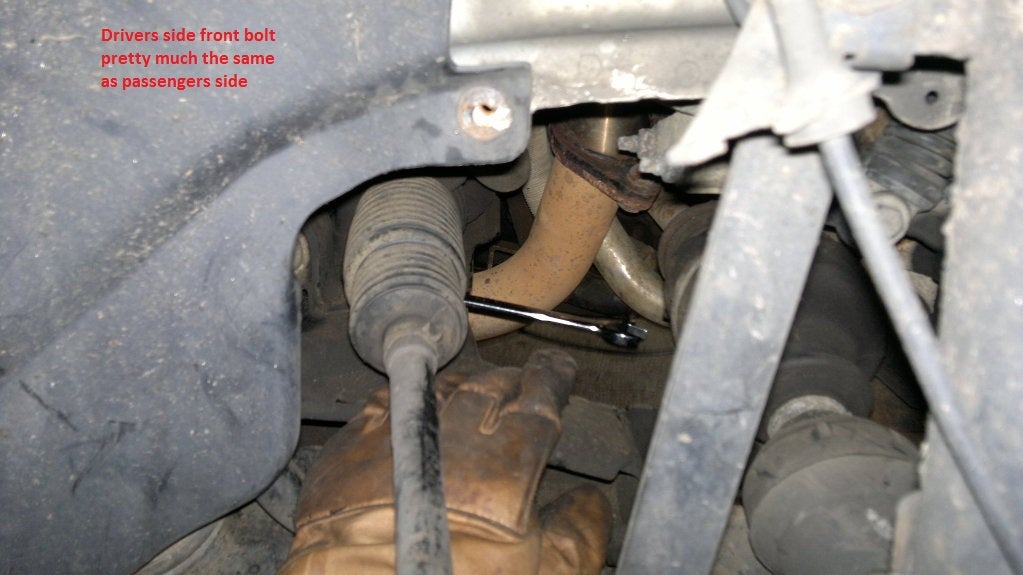
be very careful of causing damage to the power steering gaiters, causing damage to these will cause unnecessary huge bills when working on the drivers side, beware of the fuel and brake lines that pass directly above the ARB clamp bolt when working on the passenger side beware of the coolant switch thingy and its wires basically, there is not much clearence for doing this job short of removing the sub frame, which is definatly not recomended as you can and will very easily mess with the thrust angle of your car!
"'REMOVAL"'
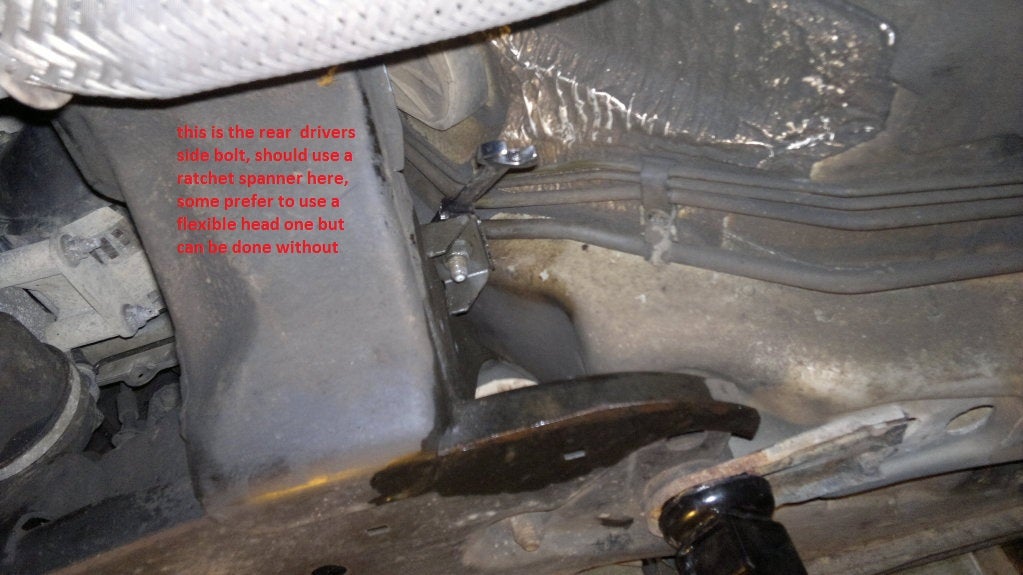
tools; WD-40, 13mm flexi neck ratchet spanner (for rear bolts), and 13mm fixed neck ratchet spanner (for forward bolts), a hammer, jacking bar from trolley jack, various pliers, something thin (less than 1" thick) and must be strong! (i used my big mole grips)
method;
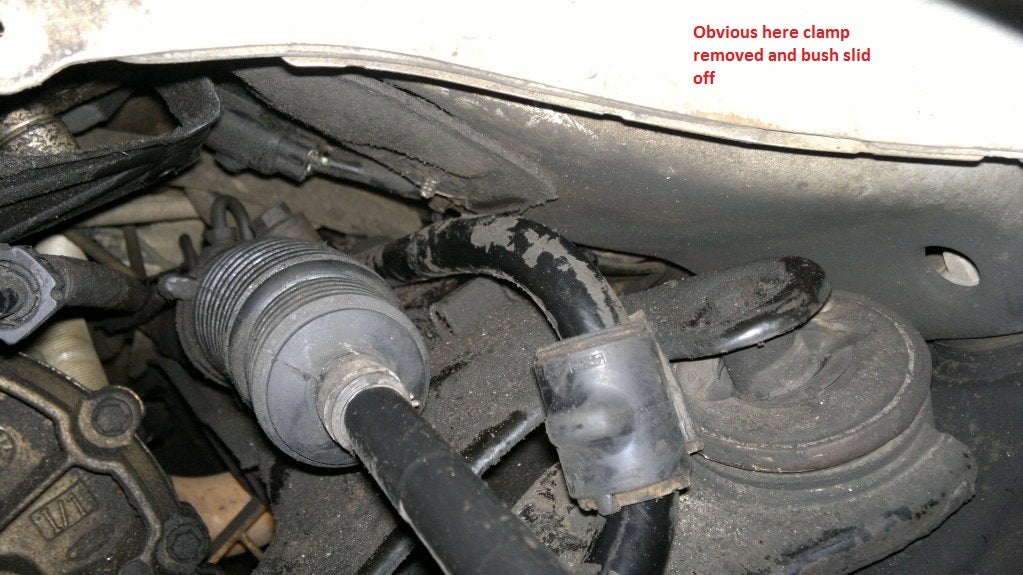
apply liberal amounts of WD-40 to bolt and nut not always necessary though. crack of the torque from both bolts, undo each bolt 50% at a time. remove both bolts use jacking handle and hammer or long screwdriver or similar tool to prize the ARB clamp off of the bush and towards the centre of the car, you should be able to remove it from underneath. using a suitable took try and split the bush (there is a split in the bush so you may be able to prize it up). if you cant split it dont be too worried, lever the arb up to lift it off its seat and pull the bush towards you and slide it off.
you may find the job easier by disconnecting the droplink but its no essential.
preparation prior to fitting
tools; copper slip (lots of), emery paper, new poly bush and a bloody sharp knife!
method; once both ARB clamps have been successfully removed, and you have the old ARB bushes out, you are past the point of no return. be brave, it'll be much easier putting it together. clean the insides of both ARB clamps with the emery paper, completley cover the insides of clamps in copper slip it is also worth giving the ARB itself a wipe as far as possible along the length where you will be sliding the new bush on, and also where it mounts to, being careful to remove any WD-40 oversprray (if used) as this is harmful to polyurethane rubber
N.B. only flo-flex (can be found on ebay) supply the front roll bar bushes at the present time. The ones i used from flo-flex came as a solid piece with no split in them. DO NOT PANIC THIS IS EASILY RECTIFIED!!!
METHOD
along the side of the bush there is a very crude looking join, using your sharp knife, slice carefully, and as straight as possible at the "top" half of this line. (closest to the curved side of the bush) you will also notice on the inner edges, at both ends of the bush, (the bit which will actually clamp the ARB), there is some over flow in the form of a ridge. remove this using your sharp knife. also to make fitting the clamp to the bush a HELL of a lot easier, go back to your initial slice along the crude split on the bush, slice thinly and diagonaly across the "LOWER" edge of the bush on the outward face, (this allows the clamp to slide onto the bush a HELL OF A LOT EASIER!) thus making a small gap where you have split the bush. apply copper slip to the "inner" faces of the newly modified bush
Fitting
tools; both spanners from removal, hammer and trolley jack handle, deep throat 13mm socket, mole grips, your thin + hard tool from earlier
method
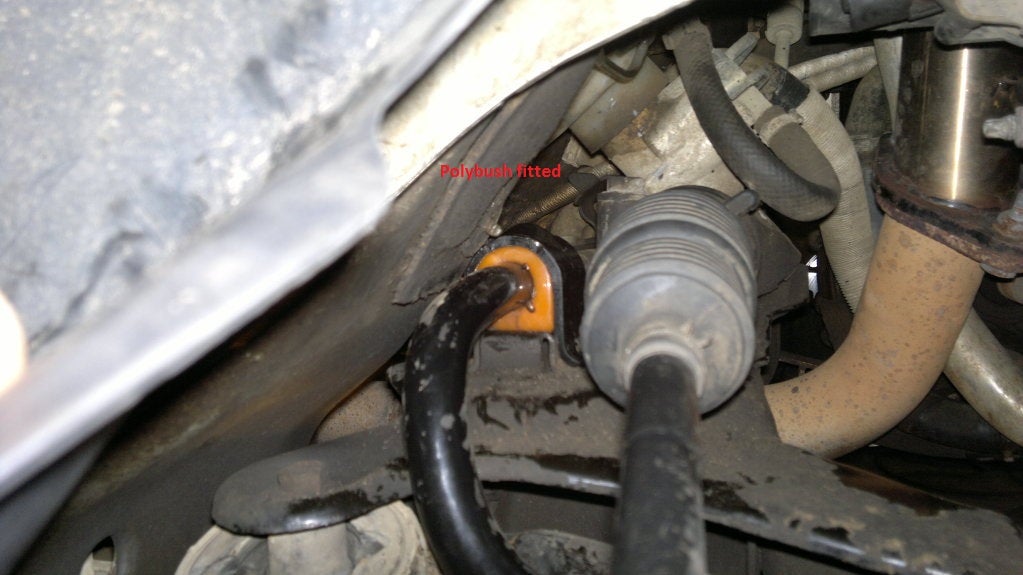
place new ARB bush on ARB, with the split facing to the rear of the car slide it up the bar and lever the ARB up to get the bush into place on the raised platform. with the bush in place roughly, you now need to wiggle the clamp back on in the same manner you removed it, now comes the fun part.
using a combination of grunting, screaming and shouting wiggle the clamp into position on top of the new bush, once it is roughly aligned, and you have pushed it onto the bush as much as possible, try to refit the bolts.
YOU DONT NEED TO BE ABLE TO DO THEM UP FULLY, JUST A COUPLE OF THREADS.
this is where the deep throat socket comes in handy for the front bolt, put the socket on the bolt at an angle then push it against the steering gator to straighten it up. once both bolts are in about 2 turns, you need to get the new bush as central as possible, gently tap the bush to get it as central as possible, you might need to lever the wishbone again also to move it back and forth.
once your as haapy as you can be (or you've given up) start winding the two bolts down ( i used both ratchet spanners simultaneously to achieve a straight fit. tighten to the specified torque and job done
Some pictures provided below
Thanks to mackay780 for the writeup and pictures
 Your Privacy Choices